

A few months ago, I had a client that wanted to begin their drone video essentially with an animated map that would provide context on where the property is actually located. We were looking for a cool way to incorporate the map into the video itself, instead of just flashing a picture on the screen. So, I started playing around with Google Earth and came up with a great way to incorporate a Google Earth drone transition into our video. You can check out the final video we produced at the bottom of this page. The video at the top tracks along with this blog post as a video tutorial on how to create the Google Earth drone transition.
Today I’m going to show you exactly how I put together a great video transition using nothing but Google Earth and Final Cut Pro X. To be fair, I hired someone on Fiverr (this is an affilliate link, see my disclosure here) to put together the animation of the highlights on the map itself, but I did the transition from Google Earth into our drone video.
Creating the Google Earth Pro Tour
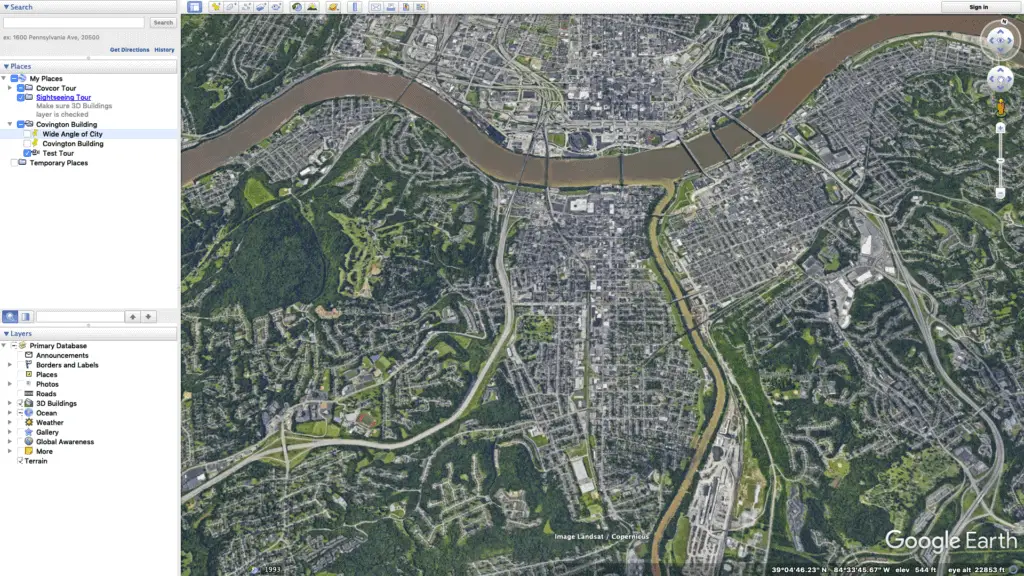
First, you’ll need to have Google Earth Pro installed on your computer. Once you open Google Earth, you’ll want to navigate to the general location of your shoot. For me, I’ll be using Cincinnati as an example. I’ve navigated to a picture of Cincinnati that will be the starting point for the zoom in. In the sidebar, you’ll want to create a folder for your tour. Mine is going to be called “Covington Building” since I am shooting a commercial property in Covington, KY, just south of Cincinnati. As you can see, this view provides a good look at the property from a really high view and what we ended up doing was highlighting the major highways in the video with an animation.
Once you’ve created your folder and you’ve navigated to the view you want to use as the starting point of your video, you’ll need to highlight the folder and right click. A menu will come up and you’ll choose the “Placemark” option. A pin should pop up on the map, and you will name it. Here, I’m naming mine “Wide angle of city.”
Once you have this point recorded, uncheck the box next to it to remove the picture of the pushpin on the map. If you don’t, it will record the pushpin when you record the tour, you don’t want that.
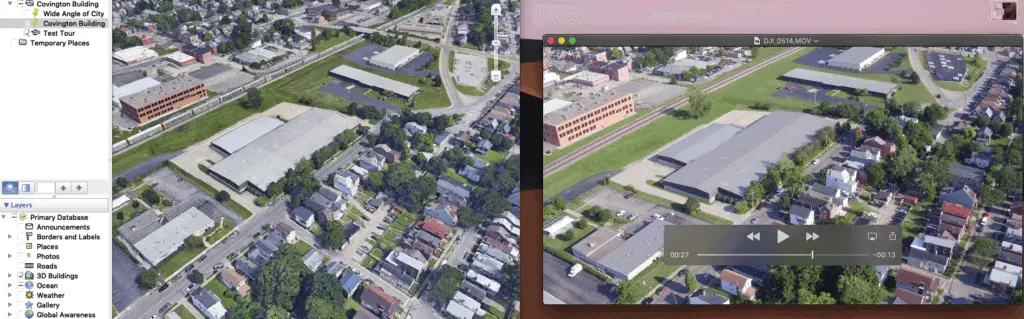
Now, at the top of the sidebar, you will need to search for the location of the property that you filmed. This is the tricky part but also what makes the transition look good, so take your time here. When I filmed this property, I took a relatively high point of interest shot around the building. It is the shot that I chose to use as my transition from Google Earth to drone footage.
I pulled up this video next to Google Earth so that I could compare it as I tried to match the beginning point of my drone footage. Once you’re there, pause the video and navigate around Google Earth until you make the visual in Google Earth look like the visual in the start frame of your video. This will require playing with the rotation and tilting. On a Mac, just hold down Command and navigate with your mouse. I’m assuming there is a similar ability to do the same thing on a PC.
Then, just like before, once you have the visualization as close as you can get to your starting frame on the drone footage, you will create a “Placemarker” that will mark the location and position of the Google Earth view. Again, once it is placed, uncheck the box so that the pushpin disappears.
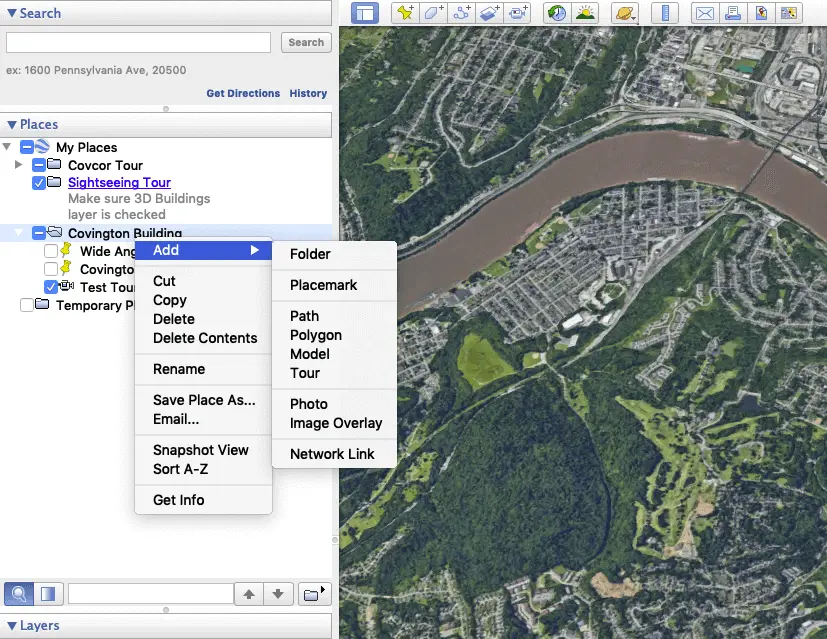
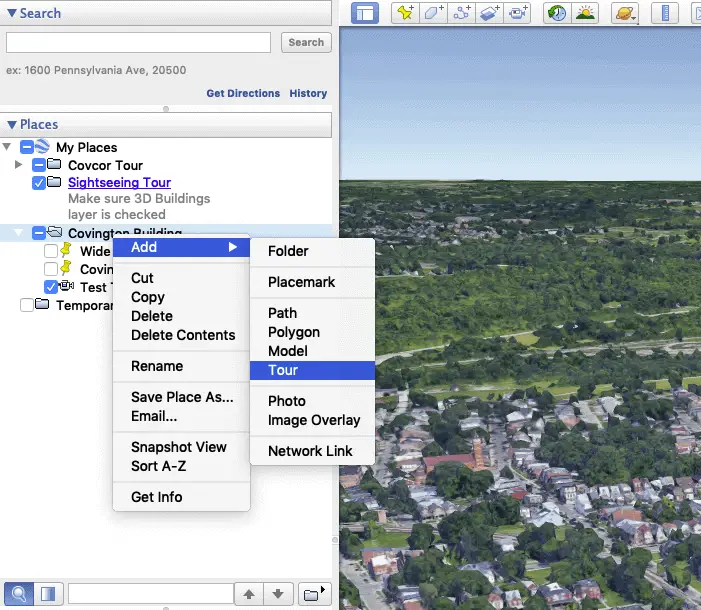
Right click on the folder again and mouse over to “Add,” then add a “Tour.” A little box will show up in the bottom left hand corner of the map. Click the record button and then in the sidebar, click the wideview placemarker you saved at the beginning. This will zoom the view way out to your wide view. Once this is completed, stop recording.
Now in the top navigation bar, click “Tools” and choose “Moviemaker.” Doing this will bring up a menu that looks like this.

You’ll want to choose the tour that you just created, the “save to” location as well as the video parameters (I just create an MP4) and then choose “Create Movie.” This will record a movie file of the tour and place it on your desktop (or wherever you’ve chosen to place the file).
Once you’ve got the file, you’ll notice that the tour is actually zooming out and we’re looking to zoom in. We can always reverse it in Final Cut Pro but in my experience, Google Earth doesn’t do a very good job zooming in. It always wants to take these angles and movements that just don’t look good. So I’ve started to zoom out from my filming location and reverse this clip later. It just looks better.
Importing to Final Cut Pro X
Import this clip into your timeline in Final Cut Pro and then pair it up with the footage you used at the beginning so that the end of the zoom meets up with the start point on your drone footage. Then you’ll want to apply a “flow” transition into your drone footage. This is included as a stock transition in Final Cut Pro. If you’ve lined the Google Earth recording up well, it will blend right into your drone shot.
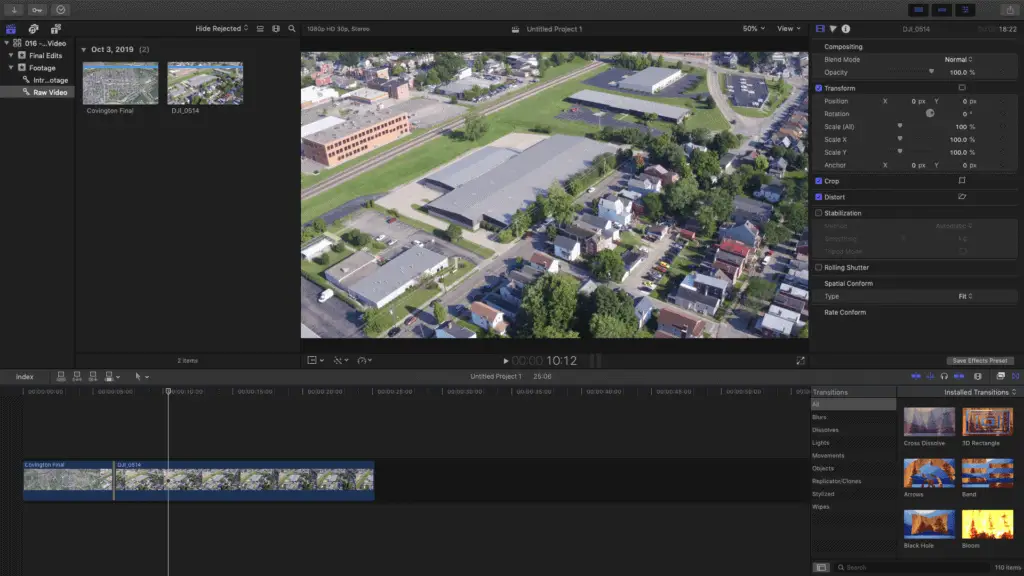
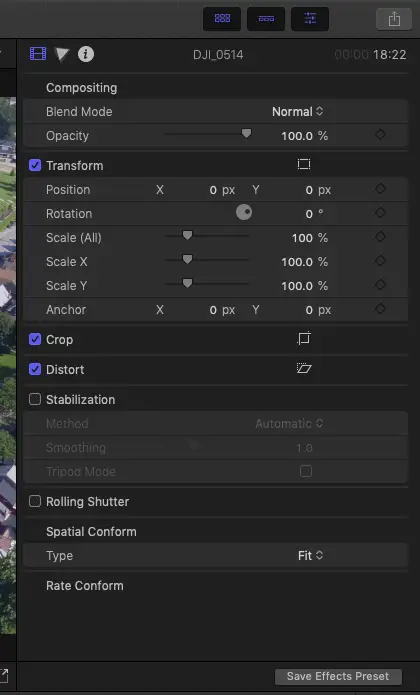
The last thing I’ll say is that Final Cut allows you to zoom in to footage, and if you’d like, you can scale the Google Earth tour just enough to remove the Google Earth stamp in the corner. You can do this utilizing the “Scale” option in the menu for video footage to the top left.
I’m not going to walk through making the whole real estate video (maybe that will be another post) but this transition is a great way to make your videos stand out, especially when the location of the property is important. Below I’ve posted our final product for the example that I used above.
If you’ve made it this far and this article was helpful to you, I put out new content all the time and would love to be invited into your inbox. I hate emails that clutter my inbox, so I won’t clutter yours. Just helpful information about flying your drone legally. Sign up below if you’re interested.